Showing posts with label snack. Show all posts

Tuesday, October 13, 2015

Winter Fruit, Yogurt and Marmalade Pasta Salad


Today for lunch I had this sweet and super tangy fruit salad along with a few pieces of white cheese. I have to say I feel like I splurged a bit but in reality it took all of 10 minutes to make and was a very simple and healthy treat  lunch. 


“By posting this recipe I am entering a recipe contest sponsored by the National Pasta Association and am eligible to win prizes associated with the contest. I was not compensated for my time.”


Did you know that cous cous is actually a pasta? Similar to orzo, another small pasta that resembles rice, it is in fact pasta. Traditional cous cous is very small and delicate and cooks up in just a few minutes. Israeli cous cous is a bit bigger and resembles small pearls and also cooks up in just a few minutes.  I like to to use Israeli cous cous, which is a bit sturdier as a base for grilled salmon and as a side dish tossed with chopped veggies and olive oil or fruits, nuts and yogurt. 


Apples and pears are plentiful right now and made a wonderful pasta salad tossed with pecans and raisins. A simple dressing of fat free yogurt and Seville Marmalade really made all of the flavors POP 
I used a couscous, orzo and lentil medley for this fruity pasta salad so it was hearty and filling enough or a light lunch. 


This was a big hit with the kids who love rice pudding. When cooked, Israeli cous cous has a similar texture as rice but is not void of nutrients as white rice is. Plenty of natural sweetness going on in this fruit salad and the Seville Orange Marmalade added a definite bitter zing.


Just a few simple ingredients to chop up while the couscous simmers for 8 minutes. 


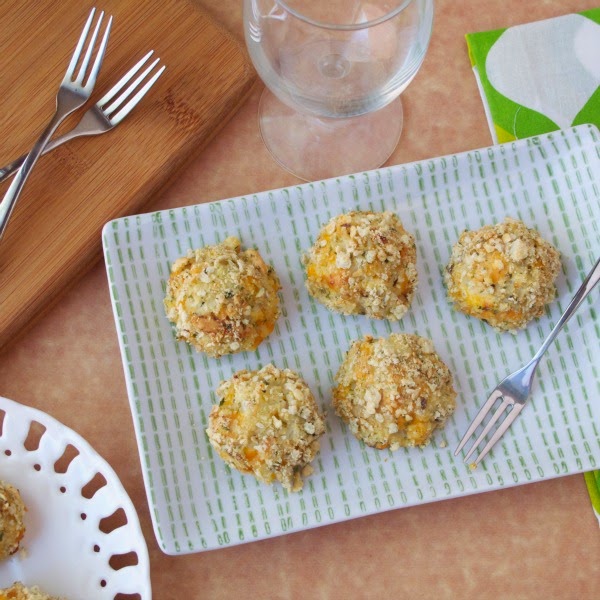
Pair with your favorite cheese for a perfect light lunch.


You Will Need 
1 apple
1 pear
1 cup chopped pecans
1/2 cup raisins or dried cranberries
1 cup dried Israeli couscous medley
1 1/4 cup water
1 cup plain, fat free yogurt
1 cup Seville Orange Marmalade


Bring a small pot of water to a boil. Immediately add couscous, stir and cover. Turn heat down to low.  Simmer for 8 minutes. Remove from heat and let cool while you chop fruits.

Chop apple and pear, discard seeds. In a small bowl combine yogurt and marmalade.

In a medium size bowl combine all ingredients, toss to coat. 


You Might Also Like


Whole Grain Dijon Mustard Salmon on a Cous Cous


Read more ...

Thursday, October 1, 2015

Chocolate Chunk Pumpkin Cookies {healthy, gluten free, egg free}


This is our go to cookie recipe year round. We have them a few times a month for breakfast and I send them to school as a healthy sweet treat in the munchkins lunch boxes. They are perfect for an afternoon snack emergency and are tons healthier than most pumpkin cookies out there. 


I knew I had to find a healthier alternative to the big. fat. deliciously. sweet. pumpkin chocolate chip cookies from Trader Joes. They are my kryptonite. My mom actually came up with this recipe a ways back and whenever I get that sneaky chocolate + pumpkin craving I whip these babies up. 


Much, much healthier.  Wheeww!  Later Kryptonite.


Thank you for purchasing my favorite healthy ingredients and kitchen products from Simply Healthy Family's store and thereby, supporting this blog! 


We make these cookies eggless by using flax "eggs" simply because flax is so darn good for you! They are high in lignans, a fiber like compound and also in antioxidants, B Vitamins and good for you Omega-3 fatty acids. 

We also throw in hemp seeds or hemp hearts which are another super food. Raw hemp provides an array of health benefits such as: weight loss, increased and sustained energy, rapid recovery from disease, lowered cholesterol and blood pressure, reduced inflammation, improvement in circulation and immune system as well as natural blood sugar control.


The pumpkin puree in these cookies not only makes them super moist and adds everyone's favorite fall flavor but contribute many good for you vitamins and nutrients as well. Did you know that pumpkin helps your body by

  • Keeping your eyes sharp by providing carotenoids vitamin A 
  • Aids in weight loss from it's high fiber content which helps you feel fuller longer.
  • May reduce your risk of getting cancer due to high levels of antioxidant beta carotene
  • Protects your skin and reduces signs of wrinkles from it's free-radical-neutralizing powers of the carotenoids
  • Boost your mood by producing more serotonin in your body thanks to the amino acid tryptophan, the famed ingredient in turkey.
  • Helps your body recover after a workout. A cup of cooked pumpkin has more potassium than a banana. A little extra potassium helps restore the body's balance of electrolytes after a heavy workout and keeps muscles functioning at their best.
  • Boosts your immune system. 1 cup of cooked pumpkin provides 20% of your daily recommended dose of Vitamin C.


You gotta love a sweet treat that is good for you on so many levels.


These cookies are gluten free, dairy and egg free and sweetened with just a touch of maple syrup (or honey) a handful of chocolate chips but of course you could skip them if you prefer.  Make sure you have a glass of ice cold milk handy to wash down these cookies!


You Will Need

2 flax 'eggs' {2 tablespoons flax meal + 1/4 cup warm water} or 1 egg
1/2 cup cooked (or canned) *pumpkin
1/2 cup natural, sugar free peanut butter, almond butter or *tahini
1/2 teaspoon *aluminum free baking powder
1/2 teaspoon baking soda
1/2 teaspoon ground cinnamon
pinch of *iodized salt
1 teaspoon pure vanilla extract (not imitation)
1/4 cup *real maple syrup or honey
1/2 cup *flax meal (ground flax seed)
1 cup *rolled oats
1/2 cup (optional) chopped walnuts, pecans and/or raisins
1/2 cup dark chocolate chips or cacao chips
2 tablespoons hemp hearts

Preheat oven to 350˚F
In a small bowl combine ground flax meal and water with a fork and let rest about 5 minutes. Combine wet ingredients in a large bowl and dry ingredients in another bowl. 
Add flax eggs to the wet ingredients and stir in dry ingredients. 
Drop cookies by spoonfuls on a Silpat (or a lightly greased baking sheet). Put silpat on cookie pan and place in oven. They will not expand much while cooking. Bake at 350F for 15-17 minutes or until golden brown. 
Let rest on a baking sheet for a few minutes before transferring to a cooling rack. After completely cooled, store in an air tight container for up to 3 days. Refrigerate or freeze if storing longer than that. 


Happy Harvesting!

Read more ...

Monday, August 17, 2015

Peanut Butter and Jelly Popcorn #SundaySupper


Here's the thing. I'm a procrastinator, through and through. I'd like to blame it on the kids but I'm pretty sure I've been this way since, well puberty I think. I mean, don't get me wrong, the chaos, constant interruptions, fighting, yelling and occasional minor civil war in the family room don't help matters any but I'm a procrastinator nonetheless. Which is why I'm making, photographing and writing this post and 7:37 on a Saturday evening.


Take back. It's totally the kids fault. They've been in here 72 times in the last 4 minutes and screaming at each other when not in 'my' room. The darlings.


But, we shall focus on the task at hand which happens to be popcorn. Peanut Butter and Jelly Popcorn. Peanut Butter and Jelly popcorn coated in rich, velvety, melted white chocolate sort of popcorn. Because sometimes that's how it needs to be done. That's a matter of fact.


In an effort to bring the aforementioned darlings a special treat for Back to School I went with a special spin on our all time favorite snack, popcorn. Major success. The Sunday Supper Team has collaborated once again to pull together a bountiful list of Back to School snacks, sips and main dishes for you all.

Another huge thanks to Tammi at Momma's Meals for helping me co-host this weeks Sunday Supper!


While I am aware that this snack has sugar in it which is a rarity in our house and certainly on this blog, it is if fact a special treat. I do however choose my ingredients carefully and don't buy products containing High Fructose Corn Syrup and other chemically manufactured ingredients. Have you looked at the back of the jars and whatnot's that you're purchasing lately? It was really difficult to find a jam or jelly that didn't contain HFCS, in fact, it was the first ingredient on almost all of the jars. I usually buy the Costco/Kirkland brand jelly and PB which contains all natural ingredients. At the grocery store, Smuckers All Natural was the only brand that didn't have HFCS or preservatives in it.


Now I'm off to watch a movie with the sweet darlings. Funny how Despicable Me, Ratatouille, Princess Diaries and Frozen never get old......... well maybe Frozen :)


Happy Back to School Snacking!


You Will Need

Wax paper or a silpat
4 cups popcorn (1/2 cup kernels)
1 cup white chocolate chips, divided
1 heaping spoonful all natural, no sugar added peanut butter
1 heaping spoonful grape jelly

In a small, nonstick sauce pot add half of the chocolate. Cook on medium till they start to melt while stirring with a rubber spatula. Stir in the peanut butter and cook until combined. 

Repeat with the remaining chocolate and jelly. 

Divide the popcorn into 2 large bowls. 

Pour the peanut butter mixture over one bowl of popcorn and toss to coat. Repeat with the jelly mixture and remaining bowl of popcorn. 

Spread each bowl of popcorn evenly on a sheet of wax paper or silpat. Let cool to harden. I put mine in the fridge for a bit. 


 I hope you will Pin and share this post and then visit all of my friends who share in the mission to bring simple, delicious foods to the table during the school year and beyond.


Join the #SundaySupper conversation on twitter on Sunday! We tweet throughout the day and share recipes from all over the world. Our weekly chat starts at 7:00 pm ET. Follow the #SundaySupper hashtag and remember to include it in your tweets to join in the chat. To get more great Sunday Supper Recipes, visit our website or check out our Pinterest board.


Would you like to join the Sunday Supper Movement? It’s easy. You can sign up by clicking here: Sunday Supper Movement.


Back to School Beginnings
Back to School Lunches and Simple Suppers
Back to School Sips
Back to School Super Snacks
Back to School Sweets and Treats
Read more ...

Saturday, July 25, 2015

Strawberry Lime Aide Margarita Swirl Popsicles


There's one National Food Holiday that I look forward to every year.  No, not National Nutella Day (I'm sure there's one of those) but National Margarita Day! It couldn't fall on a better day as far as I'm concerned. While I'll attempt to refrain from bragging that it's perfect patio sitting and margarita sipping weather here in Phoenix, I know most of the country is fed up with the blizzards and sub zero weather. Ick. 


{Sweet Treat Alert ;}


But let's think positively shall we? I think some genus of a person (obviously a woman) pinned National Margarita Day on February 22nd for a good reason. Perhaps for those who are at their wits end with snow days and snow boots and snow plows they can turn up the heat a bit, put on their sundresses and bathing suits and sip on a frosty margarita!


Makes perfect sense! I'm rational that way.


Let's savour every single tart, tangy and sweet drop of a Strawberry Lime Aide Margarita frozen style. Let the sticky sweetness slowly melt and drip on your fingers. Then slurp it up quickly so as not to waste a drop! These can be poured into tiny Dixie cups and put in the freezer with popsicle sticks like we did in the 80's (minus the tequila) or if you have a ZOKU pop maker you can have one of these Margarita pop's in less than 5 minutes. 


Yes, seriously.  5 minutes!


You Will Need


3 cups chopped strawberries
2 cups prepared lime aide (found in the frozen section)
3-4 ounces tequila of your choice
some sort of popsicle maker, mold or dixie cups w popsicle sticks (I love our ZUKO)


Make lime aide according to directions but use only 1/2 as much water!!!  In a blender, puree strawberries until smooth. Pour a bit of strawberry puree in mold. If you are using a conventional method you will need to put the molds/cups in freezer and wait 15-20 minutes. If you re using a ZOKU it will take about 1 minute. Pour a bit of the lime aide on top of frozen strawberry layer and let freeze. Repeat until the mold is full. 


Sit back. Kick your feet up and hang in there until Spring arrives!


A big.fat.huge.THANKS to Heather aka girlichef for organizing yet another magnificent Margarita Day roundup! She is one of my longest standing relationships in the food blogging world and I owe much of where I am, wherever that may be in part to her. If you haven't already, you really need to follow along on her site, girlichef. Seriously, some good f*#@ng food!


Don't stop at popsicles! Make a day..... weekend out of it, put on your best flip flops and sunglasses and check out these other margarita inspired recipes!


Margaritas:

Margarita-inspired food:


Read more ...

Friday, July 24, 2015

Greek Yogurt and Goat Cheese Tzaziki Roasted Red Pepper Zucchini Rolls with Pesto Dip A.K.A. Extremely Creative and Interesting Snacks for an Unbearably Boring Mom.


Let's talk about creative energy, or rather the lack there of. For instance, I'm pretty sure that I had something rather interesting to say 15 minutes ago but since then 1 million and 1 other extremely important things have happened. Such is the life of a mom of 4. Any mom actually, but I speak for myself (disclaimer numero uno).


Case and point. In the last 15 minutes I have:

Tried to console a very distraught 4 year old little girl about a broken crayon which her 8 year old very artistic brother absolutely had to have because it was  "Imperial Blue" and the exact shade he needed to finish his bird drawing and "NO!" another shade of blue from the enormous bucket of crayons wouldn't do and excuse me please but it in fact is not a crayon but a pastel! ..............................


Stopped 3 times to put on baby doll clothes. On the same baby doll.

Tried to reason with a dramatic 6 year old over why it's not the end of the world when someone touches him, looks at him, breathes on him.

Prepared myself for yet another night of over reactive drama and whining about how grosssssss dinner is before they even know what it is.

Tried to take a picture or two of for mentioned dinner when the house we moved into several months ago does not have ONE SINGLE north facing window, or any decent window for food photography for that matter.  (note to self, look for new house immediately. post note, be in complete denial that the housing market is yet again rising faster than my strategic abilities allow.)


Exaggerating? Who me? NO. Not this time my friends, not this time. Life as a mom, end of story. 

Again, I'm pretty sure I had something very creative or mildly interesting to say in regards to this post 15 minutes ago but alas, you will forgive me as my creativity has been sucked away over the years and replaced with the cutest of cute, adorable, little, needy monsters. 


What's the opposite of boring? These super cute snack containers from Planet Box. I. heart. their lunch boxes and so when they offered to send me one of their brand new sectioned snack boxes, 
"The Shuttle" with a perfect little dipping container I was waiting by the window for the UPS guy.  


This little snack container was much roomier than I imagined and perfect for my portioned, 5 a day small meals. As you can see it held my 'second' lunch quite nicely and I won't even mention the fact that my dear husband swiped it from me the  next morning. I did get a nice text message around lunch time about how fantastic my zucchini rolls were. Cudos.


I love Planet Boxes sleek and convenient  design and that the magnets were interchangeable. My boys loved this alien one and when mommy wants to take it to work I simply take the magnets off or I can switch them out for one of their other cute magnets. These cute space guys ended up on our fridge. 


Several different sizes to choose form with eco-conscience design and cute carriers. I love it!


Back to School Time Already! Time to get a sturdy lunch box that will last through the year! 


Planet Box sent me these items, all opinions are my own.


Read more ...

Wednesday, May 20, 2015

Grilled Pineapple with Coconut Caramel Sauce


Summer dessert doesn't get any better than this grilled pineapple in a simple coconut caramel sauce. Just throw it on the grill alongside some fish or jerk chicken and then commence lounging on the patio in complete bliss. I snuck one of these glazed pineapple pieces straight from the grill, and wasn't ready for the magic that happened. I love pineapple and something seriously amazing happens when you throw it on the grill. The natural sugars are brought out by the flames and the pineapple juices become a smokey caramel flavor.


And just to make things even better we drizzled the hot pieces of grilled fruit with a coconut caramel reduction. Thick, gooey and hot coconut caramel paired with grilled pineapple is a match made in dessert heaven. We had this alongside our grilled fish tacos and not a peep was uttered during dinner on the patio that night except for Mmmmmmmmmm's and the occasional Oh yeeaaahhh!


Instead of spending time in the kitchen baking dessert this summer try throwing different fruits on the grill for a super simple after dinner treat. My other favorite fruit to grill are nectarines, the flavor brought out from grilling them is out of this world!


recipe from Sunset Magazine


TIME     20 MINUTES          SERVES     6


1 large pineapple
1/2 cup water
1 cup granulated sugar
3/4 cup coconut milk (the kind in the can)
handful of shredded, sweetened coconut


Pre heat outdoor grill to medium high. 
In a small saucepan over medium high heat bring water and sugar to a steady, low boil stirring just to combine.  Continue to boil rolling the pan to swirl liquid occasionally. Do not stir. This will take about 15-20 minutes before the liquid reduces and turns into a caramel color and consistency. Continue to boil gently swirling pan until you have a thick caramel reduction.  
Meanwhile trim the top and end off of the pineapple. Trim of the outer skin and discard. Cut the pineapple in half lengthwise then cut each half lengthwise again so you have four long pieces. Cut the core from each piece and save for use in a green smoothie the next day.  Cut pieces in half again lengthwise if they are too thick, then cut them in half to make smaller pieces.  
Remove pan from heat and carefully pour in coconut milk while whisking to combine. The caramel sauce will bubble and splatter so be careful. Pour some of the caramel sauce into a small serving bowl reserving the rest to brush over the pineapple.  
Place pineapple pieces in a large serving tray or plate. Brush with the coconut caramel sauce to coat them. Using tongs, place them on the hot grill. Let them sit for 2-3 minutes then turn them over and cook another 2-3 minutes. Remove from grill and serve immediately!  
Drizzle with more caramel and enjoy!


What are your favorite summer desserts?

Read more ...

Monday, May 11, 2015

Mini Tarts with Cherry-Fig Compote


“I received free samples of Breton Gluten Free Original with Flax and Breton Gluten Free Herb and Garlic from Dare Foods Incorporated mentioned in this post. By posting this recipe I am entering a recipe contest sponsored by Dare Foods Incorporated and am eligible to win prizes associated with the contest. I was not compensated for my time.”


What do you bring to a last minute dinner party when you have zero desire to go to the store, mostly because it will interrupt your already planned day of being lazy, maybe doing some Pilate's and getting in at least an hour of afternoon pool time. I know, I have it rough. Well, I know we will be having wine during and after dinner so I thought some cute mini tarts filled with a fig-cherry compote would be a fantastic idea. Maybe I'll stop and pick up a bottle of port to go with them.

note to self: don't eat all of the tarts before dinner even though your house smells heavenly.

I can do this.


I've remade these from an older recipe of mine for fig bars using mostly oats and flax for the crust. This time I tried using Breton's Gluten Free Crackers with Flax for half of the mixture and they turned out great. Don't look at me like that, I had to try one.... o.k. two you know, just to make sure they were blog and dinner party worthy. The things I do for you people!


Compote (French for "mixture") is a dessert originating from 17th-century France made of whole or pieces of fruit in sugar syrup. Whole fruits are cooked in water with sugar and spices. The syrup may be seasoned with vanillalemon or orange peel, cinnamon sticks or powder, cloves, ground almonds, grated coconut, candied fruit, or raisins 

The French invented compote believing that fruit cooked in sugar syrup balanced the effects of humidity on the body. The name is derived from the French word compote, meaning mixture. Compote was originally served as an afternoon snack with sour cream and biscuits. During the Renaissance, it was served chilled at the end of dinner. 


Pulse the oats and Breton Gluten Free Flax crackers into a flour.


Snip the little stems off of the figs.


Coat a mini muffin pan with cooking spray. Using a small spoon, scoop a small amount of the dough into the muffin tin pressing down with your fingers to form a hole in the center, leaving some dough on the bottom and up around the edges of each cup.


Mini Tarts with Cherry-Fig Compote


Mini Tarts with Cherry-Fig Compote

TIME     30 MINUTES       YIELDS    12 MINI TARTS

Filling:


6 ounces dried Figs (preferably Organic)

4 ounces dried Apricots OR dried Cherries (preferably Organic)

2 tbsp. chopped almonds

2 drops anise extract (optional)

1 tbsp  local, Organic honey (local honey help with outdoor allergies!) 
2 tbsp. water

2 tbsp. orange juice OR lemon juice

1/4 tsp. cinnamon

1/4 tsp. ground ginger


Snip off the figs' stems, and put them, the apricots, almonds, water, honey and spices into the food processor. Pulse to a coarse paste. Spoon out of food processor and set aside in a small bowl.

Crust:

1 cup regular or quick oats
 
1/2 cup whole oats
12 Breton's Gluten Free Crackers with Flax
1 teaspoon baking powder

1/4 teaspoon salt

4 ounces unsweetened apple sauce

1 tablespoon local, Organic honey

1/3 cup water


Directions:
 
 Preheat oven to 375 F. Combine the dry ingredients in a mixing bowl. Stir in the wet ingredients, mixing well to a thick consistency.
Place 1 cup of  oats and the crackers into your food processor or blender. Pulse until you have a flour.  
Coat a mini muffin pan with cooking spray. Using a small spoon, scoop a small amount of the dough into the muffin tin pressing down with your fingers to form a hole in the center, leaving some dough on the bottom and up around the edges of each cup.
Spoon the fig mixture into each cup. 
Bake at 375F for 15-20 minutes until crust is golden brown. Let cool on a wire rack before removing tarts. Serve warm or at room temperature with afternoon tea or with wine for dessert. 


Now, off to quickly fold some laundry, if that's possible with the amount of laundry we have in this joint. Second thought, forget the laundry. Off to do 45 minutes of Pilate's which brings me to my happy place and then go sit by the pool.


Have a great weekend my friends!


    An InLinkz Link-up
   
Read more ...

Sunday, May 10, 2015

Chipotle Cheddar Cheese Cauliflower Poppers


“I received free samples of Breton Gluten Free Original with Flax and Breton Gluten Free Herb and Garlic from Dare Foods Incorporated mentioned in this post. By posting this recipe I am entering a recipe contest sponsored by Dare Foods Incorporated and am eligible to win prizes associated with the contest. I was not compensated for my time.”


    I'm a "To Do" list kind of person, which falls under the category of "Make it Happen people!"
    But not to be confused with "Extremely focused and Organized" sort of gal. So why then does it seem like procrastination gets the best of me every so often and sabotages my very un organized to do list?  For all of my worrying and stressing about any given thing, I typically put off most chores and projects until the last minute when my "Get off your ass and snap to it" personality surfaces. She's a bitch sometimes.


    Soooooo, when my latest blog project was to come up with a gluten free recipe using Breton crackers I in true form mulled the choices over and over and over  for weeks (tell me that's not a bad thing) until yesterday when I decided to double check the deadline and oh crap, 5 days! No problem right? Wrong. Wordpress decided to "block me due to suspicious activity" just because I forgot my password..... three times..... in a row. All because of a major hacker sittuation involving Word Press. Hackers suck. Big time.


    So now I'm sitting here with 2 killer recipe ideas and a major deadline (I like how that makes me sound very important, kindof Mad Men like) and no way to access my WP account. Wait, I don't even use WP as a blogging platform! That's the kicker! 


    Deadline or not, I'm bound and determined to share these cheesey poppers with a punch with you. You have to have something fun and original to bring to your next potluck right? I'm planning a small back yard get together with our friends soon and can't wait to see the expressions on their faces when they pop these seemingly innocent tots into their mouths. 


    I rolled the poppers in Breton's Gluten Free Herb and Garlic Crackers which I pulsed to a crumb in my handy little food processor for the extra crunch factor and flavor. Simple as that!


    Best of all, no one has to know they're totally healthy! Instead of bread crumbs I used Breton's Gluten Free Crackers  in the poppers. No gluten to bloat your tummies and they are low fat and low on the glycemic index.  Cauliflower was used instead of starchy potatoes as the base for these cheesey poppers. Warning, they are a tad spicy and very addictive so have an ice cold beverage near you to wash down all 30 poppers you devour. Or is that just me?


    Of course while you're putting these poppers together you will want to snack on a few crackers with cheese. This is my new favorite cheese lately and will be buying these Breton crackers often in the future, yum!  The cheddar is so buttery and soft and the flavor is amazing! It's not overly spicy but has an after 'kick' of chipotle peppers. It melted perfectly in these poppers and didn't ooze out of them onto the pan.


    Simply steam your cauliflower florets for 5-6 minutes (don't overcook or you'll have mashed cauliflower). Then throw 4-5 florets in your mini food processor and pulse a few times until it becomes a rice consistency. I love my little hand operated food processor because it allows me to chop my food to exactly the right consistency which is imperative in this recipe.


    Line a baking pan with parchment paper and place your poppers 1/2" apart. I love my stone baking pan which always turns out perfectly browned veggies, poppers, cookies and beyond.


    TIME     30 MINUTES        YIELDS     30 POPPERS

    Chipotle Cheddar Cheese Poppers GF using Breton's Crackers

    Ingredients

    1 small head of cauliflower, chopped into florets
    4 egg whites
    1/2 cup shallots, minced
    2 tablespoons dried parsley (or fresh)
    1 cup Chipotle Cheddar Cheese, grated (or cheese of choice)
    1/2 cup (about 8 crackers) Breton Gluten Free Original Crackers with Flax
    1/2 cup (about 8 crackers) Breton Gluten Free Herb and Garlic Crackers
    salt and pepper to taste


      Directions:

      In a large stock pot steam cauliflower florets for 5-7 minutes. Do not over cook! Drain water and place florets in a bowl and freeze for 30 minutes or refrigerate for at least 1 hour (this will help with shaping them into balls).

      Remove chilled cauliflower from freezer and place in a food processor. I use this small hand operated chopper  which allows you to control how course or finely chopped your food will be. Chop until cauliflower is the consistency of couscous or rice. Do not over process or you will have mush. Remove any remaining chunks of cauliflower and discard. Scoop cauliflower into a large bowl.
      Add cheese, shallots, parsley and Breton's Original GF Crackers with flax, salt and pepper. Mix to combine.

      In a separate bowl or mixer, beat egg whites until just frothy. Fold the egg whites into the cauliflower mixture till just combined. Fold egg whites into cauliflower mixture.

      Preheat oven to 400F.

      In your food processor, pulse Breton Gluten Free Herb and Garlic Crackers until they are a fine crumb. Place them in a large shallow plate. Using your hands, shape the cauliflower mixture into golfball size balls. Gently roll the balls in the cracker crumbs to lightly coat. Place on a stone baking sheet lined with parchment paper 1/2" apart.

      Bake at 400F for 20 minutes or until cheese is bubbly and balls are deep golden brown and crispy.


      Serve warm! These make a great appetizer to any dinner party or picnic.


          An InLinkz Link-up


      Read more ...