Showing posts with label tomato. Show all posts

Thursday, October 15, 2015

Golden Beet Ragout ~ Italian Inspired Comfort Food


Beets. The infamously dreaded root vegetable. I must admit that I pass them by at the grocer and the farmers market more often than not. Mostly, I think, it's that I'm not sure what to do with the little guys other than pickle them and put them in my salad. 

Thanks to a little contest sponsored by McCormick Gourmet asking that we come up with a recipe using 4 ingredients, one of which is beets I decided to dive in and come up with something different, pleasing to the eye and palatable even for beet haters from way back.

Go me.


Like I mentioned, pickling beets is my favorite way to enjoy this shunned veggie but I decided to try roasting them this time and then throwing them into my ragout at the last minute.

Success.

*post note to self.   Do not cut red beets on your wood cutting board next time. They bleed like a stuck pig and stain like crazy.


In the end, I decided to go with these pretty golden beets for this Ragout. Not only would they not 'bleed' into the rest of the ingredients, which wasn't really a big deal since I was using tomatoes but I could ease the kids into trying them since they looked more like sweet potatoes or squash which they like. 


So as I racked my ever increasingly boggled mind as what to make for this contest, I decided upon a humble ragout. 'Ratatouille' is one of my favorite movies you know. Not only is the little rat cute and can think on his toes but he made this poor man's dish a fashionable meal. 


The contest was to come up with a dish that used 4 ingredients: Beets, Arborio rice {which I can't pronounce to save my life}, balsamic vinegar (yum) and dried rosemary. Then incorporate other ingredients if you so please.


No problemo. 


If you have time, I'd much appreciate if you'd stop by and quickly Pin and/or 'like' my submission
Means the world to this simple girl.


SERVES    6       TIME    90 MINUTES      
Ingredients

1 cup dried (or 1 can) of Great Northern Beans (AKA Navy beans)
3 small beets *see notes
1 28 oz. can crushed tomatoes
1 small yellow onion, chopped
3-4 cloves garlic
2 teaspoons dried rosemary
1 teaspoon salt (I use Pink Himalayan)
cracked black pepper to taste
1 tablespoon extra virgin olive oil

1/4 cup balsamic vinegar
2 cups vegetable broth (preferably organic or home made)
*optional fresh rosemary for garnish

2 cups cooked Arborio rice *see notes 


Putting it all together


Pre-heat oven to 450F. Scrub beets with warm water. Trim the roots and stems off. cover each loosely with foil and place in a baking dish. Bake for 60-90 minutes depending on how big your beets are.

Cook rice according to package directions. See notes for helpful hints on cooking arborio rice.

In a dutch oven or large pot, heat olive oil over medium-high heat. Add chopped onion and sauté for 3-5 minutes till browned. Add garlic, cook 1 more minute reducing heat if necessary. Slowly pour in broth while scraping the bottom of the pot with a wooden spoon to release browned bits (don't be afraid of browning on your pot, it really adds flavor).

Remove beets from oven and let cool. The skins should come off very easily using a blunt knife or spoon. Discard skins. Chop beets into small, bite size pieces.

Add beets, tomatoes, cooked beans, salt, pepper and rosemary. Stir in balsamic vinegar. 


Serve with hot rice.


notes.

Choose beets that are smaller that the size of your fist. The larger they are, the more bitter and "earthy".

Arborio rice is different to prepare than any other rice but it's worth it. Packaged rice should give you instructions but I buy bulk.  If you do as well, bring 1 1/2 cups water & 1 cup rice to a boil while stirring! (I suggest using a wooden spoon as it is non-conductive and less abrasive). Cover and recuce heat to medium. You will need to check the rice about every 3-5 minutes and stir carefully. When the water is not quite all the way absorbed (be careful, you don't want it to completely absorb as you will have sticky, gooey rice) you will slowly add 1 cup more of water and gently stir. Cook over medium heat while continuing to stir every 3-5 minutes, covered, and adding 1 more cup just before the liquid is completley absorbed. Do this 3 times for a total of 3 extra cups of liquid.

You can do this. Yes, it is worth it. Arborio rice is much loved in making risotto and goes marvelously with this ragout.


Read more ...

Friday, October 9, 2015

Toasted Ravioli Caprese #RecipeRedux #NationalPastaMonth


Finger size, four cheese ravioli's dipped in buttermilk and coated with Italian bread crumbs then baked to a  golden, crispy perfection. Throw them on little toothpicks along with Heirloom cherry tomatoes, fresh mozzarella balls and a basil leaf for a unique and delicious party favor. 


“By posting this recipe I am entering a recipe contest sponsored by the National Pasta Association and am eligible to win prizes associated with the contest. I was not compensated for my time.”


Pasta comes in all sorts of shapes and sizes and ravioli is one of them. I love ravioli for it's simplicity,  it's mysterious filled center and of course it's classic comfort food appeal. Mushrooms, butternut squash or an assortment of cheeses, biting into one is as satisfying as it gets. Toasted four cheese ravioli turns your traditional caprese salad into a filling and fun little appetizer. Who says football food can't be fancy?


I made the first batch by frying them and they turned out a bit dry for my taste and not very cheesy.
The second batch, I coated the same as the first and baked on a cookie sheet lined with parchment paper. They puffed up nicely and turned out fantastic! 


You Will Need 
20 oz package of (refrigerated) ravioli of your choice
2 cups Italian Panko bread crumbs
1/2 teaspoon salt
1 egg
2 cups buttermilk (or heavy cream)
30 cherry tomatoes
2, 8 oz packages of fresh mozzarella balls
30 fresh basil leaves (I used Thai basil leaves from my garden which is why they are purple)
1/4 cup of balsamic vinegar for drizzling
parchment paper or a silpat mat
baking sheet
tongs


Preheat oven to 400F
In a medium sized bowl whisk together egg and buttermilk. Sprinkle breadcrumbs onto a plate and add salt. A few at a time, dip ravioli into buttermilk bowl to coat thoroughly. Using a fork, place the ravioli onto the breadcrumbs and sprinkle with more to lightly coat them patting gently to adhere. Place coated ravioli onto prepared baking pan. Working in small batches, continue until all of the ravioli are coated. You may need to change your bread crumbs half way through as they will become soggy.
Bake at 400F for 6 minutes, using tongs flip the ravioli over and bake another 5-6 minutes until golden brown.
Remove from oven and let cool a bit. When cool, place a tomato then a mozzarella ball and ravioli onto toothpicks. Place on top of a fresh basil leaf to serve. Drizzle a bit of good quality balsamic vinegar onto plate around the ravioli caprese. 


You Might Also Dig....


Read more ...

Friday, August 21, 2015

Baked 3 Cheese Mac with Slow Roasted Tomatoes


Sometimes you need comfort food, but in a grown up sort of fashion. Maybe it's because I have 4 kids and  my food choices are all I really have control over most of the time when it comes to gourmet or fancy but every so often, I like to indulge in comfort food gone swanky. 


Don't hate me, but I   hate   boxed Mac and Cheese.  Yes, there have been more times than I would like to admit that in a pinch I have made a pot of the boxed stuff but only when I added a can of tuna and a  lot  of hot sauce (is that strange?) to make it a bit more palatable. Maybe I'm an alien... 'Roswell' ........ Get it?..  Hot sauce. Yeah, o.k.  I watch lame t.v. series 10 years after they were (or weren't) in.  Again, 4 kids people.


So, how do you turn mac n' cheese into gourmet? Well, I'll tell you. You turn to your ridiculously large stack of Cooking Light magazines! Plant yourself on your favorite comfy arm chair on a Sunday morning with a cup of coffee, expertly tuning out the kids, or better yet commission your loving husband to take them swimming for an hour so you can flip through old issues of your trusty menu planner and  Voila!   Mac and Cheese Gourmet!


 Update! Two of my favorite food bloggers are hosting a Mac and Cheese party! They've asked for all of our favorite M&C recipes new and old to put together a fabulous list of Oooey Gooey Goodness.

“Come join Mac and Cheese Mania at Rachel Cooks andNutmeg Nanny sponsored by Door to Door Organics and OXO – Win prizes!” i


I actually found this recipe for Baked 3 Cheese Macaroni in a Cooking Light magazine several years ago and have made it several times. Most recently for my 3 year old daughter, Mona Claire's birthday.  I love the fontina, white cheddar and Parmesan Cheeses  in here and the  slow roasted tomatoes are just the tangy, sweet punch of flavor  that I need to make me drool and feel a teensy bit gourmet if only for a moment.


Slow roasting your tomatoes are a perfect way to celebrate the end of tomato season. If you don't have the time, or extra tomatoes on hand, use a package of sun dried tomatoes instead. But trust me, slow roasting them brings out a flavor that you just can't replicate in a package.


adapted from a Cooking Light Magazine issue many many years ago.....

Will Need:

8 plum tomatoes (cut into 1/4" thick slices - ~ 2 lb)
1 tablespoon extra virgin olive oil
1 tablespoon minced fresh thyme
3/4 t salt  (divided)
4 garlic cloves (thinly sliced)
1 lb uncooked multi grain whole grain elbow macaroni (such as Barilla Plus) (or non-gluten macaroni, such as spelt or quinoa)
1 tablespoon plus 1/2 c flour
5 c milk
1-1/2 c  (6 oz) shredded extra sharp white cheddar cheese
1 c   (4 oz) shredded fontina cheese
1/2 cup (2 oz) grated fresh Parmesean cheese
1/2 t butter
1/3 cup dry breadcrumbs
fresh cracked  pepper
1/2 t paprika


Putting it All Together: 
Preheat oven to 400°F. Cover a baking sheet w/cooking spray (or spread oil on). Arrange tomato slices in single layer on baking sheet. Drizzle oil over tomatoes. Sprinkle w/thyme, 1/4 t salt and garlic. Bake 35 min or til tomatoes start to dry out. 
Cook pasta according to package directions, omitting salt and fat. Drain. 
Place butter in large Dutch oven. Sprinkle in flour and whisk until combined and just golden brown. Gradually add milk, stirring with a whisk until blended. Cook over medium heat 8 min or until thick and bubbly, stirring constantly. Add cheddar, fontina and remaining 1/2 t salt, and pepper, stirring until cheese melts.
Remove from heat. Stir in roasted tomatoes and pasta. Spoon into a 13x9" baking dish coated w/oil. Combine grated Parmesan, breadcrumbs, and paprika; sprinkle over pasta mixture. Bake 400°F., 25 min. or until bubbly.


Have a wonderful and Gourmet sort of day!!


This post is linked to:

Tasty Tuesday's
Read more ...

Sunday, April 12, 2015

Roasted Chickpea, Heirloom tomato, Avocado, Lemon Tarragon and Basil Salad.


My mom is in the background reminiscing about how she always used to win the spelling bee. Every year she says, and there was a big stage and real prizes, that's how they did it in my day. All because I asked her how to spell extraordinaire. I should have known better. She's still going on and on (can't blame a gal for reminiscing) so of course I ask her how to spell reminiscing and she pauses with a bit of doubt..... HA! I totally know how to spell doubt! So I promptly turn to my handy dandy, new age spelling check thingy on my state of the art MAC computer and it shuts my poor mom down and tells me how to spell reminiscing before she can spout it out.   Pooooor  mommy.


I can't really feel all that proud about my somewhat limited technological (spell check told me how to spell that, I'm not ashamed) abilities because right after I was congratulating myself on my ability to spell a couple of 5th grade words and patting myself on the back for navigating through Photo shop to produce a half way reasonable food pic I found myself cursing my wireless mouse. You see, when I moved right, the arrow would go left. When I move up, the arrow would go down.  Gahhhh!  Why can't technology be simple?!!


Because idiots like me can't figure out when a mouse is turned upside down. In my defense it is wireless and is completely anatomical.

Yeah. I know.


It's a good thing I know how to cook without burning the house down. I love uncomplicated summer dinners. I'm declaring it summer here in Phoenix. It's in the 90's, good enough reason for me to turn off the stove and focus on quick and simple meals with fresh ingredients.


Simple, fresh ingredients. Heirloom tomatoes, chick peas drizzled with a good quality olive oil and sprinkled with some Himalayan Pink Sea Salt. Roasted to crispy perfection.  Don't feel like turning on your oven? No problem, neither do I come May. This salad tastes equally amazing with out roasting the chick peas. I happen to loooove the crispy texture and flavor that roasting brings to them but in a pinch, plain ol' cooked chick peas will do.


You can use canned chick peas or dry ones. If using canned, drain and rinse thoroughly. Put into a small bowl, drizzle with a tablespoon of olive oil and sprinkle with a salt. Spread onto a baking pan, I love my stone one which absorbs flavor and allows you to use less oil and is super easy to clean. During the hot summer months I can see myself skipping the oven all together but I do love the crispiness and flavor that roasting the beans adds.

Roast in the oven at 375F for 20-25 minutes to desired crispiness. I highly recommend investing in a baking stone. I use mine to roast veggies, bake cookies and pizza crust. You use a minimal amount of oil with a baking stone and it roasts more evenly that a metal one.  Check out this Rada Cutlery Stoneware


When I can find them, I love these pretty little Heirloom tomatoes. They are naturally sweet and so good for you, think no GMO's. Real tomatoes not genetically modified. Don't want to spend the money or can't find them in your hood. Use cherry or grape tomatoes instead.


Slice a semi-ripe avocado into bite size pieces. Sprinkle with a generous amount of dried tarragon. Tarragon goes amazing with avocado! Squeeze the juice of 1 whole lemon over the avocado and gently toss to coat. Lemon not only adds fresh flavor but helps the avocado not to brown quickly. Set aside.


Avocado tossed with tarragon and lemon.


This one was an instant keeper! Usually I make recipes several time before posting them on my blog. But I am sitting here writing this with a bowl full of this yummy salad sitting in front of me.

 It's  that  good.


Light, lemony, healthy and fresh. What more do you want in a summer salad?


Perfect to bring on a picnic! Enjoy with a cold glass of Pinot Grigio and an herbed salad mix.


TIME     20 MINUTES       SERVES     4-6 

Ingredients: 
2 cans (or 3 cups cooked) chick peas/garbanzo beans1 pint baby heirloom tomatoes, sliced in half ~ can sub cherry or grape tomatoes2 avocados, dicedsmall handful fresh basil leaves, sliced thinly1 teaspoon dried tarragon2 teaspoons divided extra virgin olive oiljuice from one lemonsalt ~ I love my pink Himalayan sea salt


Preheat oven to 375F.  
Drain and rinse chick peas if using canned. Put into a large bowl and drizzle with 1 teaspoon olive oil, sprinkle with 1/2 teaspoon of salt. Toss to coat. Spread evenly onto a baking pan, I love my stone baking sheet.  Bake on center rack for 20-30 minutes to desired crispiness. 
Meanwhile, slice tomatoes in half and dice up your semi-firm avocado. Put avocado into a large bowl first and sprinkle with tarragon. Drizzle lemon juice over avocado and toss gently to coat. Add tomatoes to the bowl and sprinkle with a bit of salt and sliced basil. Add chickpeas and gently toss to combine salad.  

Serve with a green salad to make it a meal. Don't forget the Pinot Grigio! 


Read more ...

Thursday, March 5, 2015

Baked Rock Fish with Green Harissa over Zucchini and Roasted Tomato Cous Cous


Harissa is a hot chili paste that is commonly found in North African cooking, mainly Moroccan, Algerian, and Tunisian cuisine. It is used as a dip for pita bread, added to couscous, grilled vegetables, pastas and spread on fish and poultry. Toasting cumin, mustard and coriander seeds brings out a impeccable aroma and flavor that pre ground spices just can't match. This is one to try. 


In the words of my five year old daughter, "What a Day!".  Indeed. We made bottle rockets at preschool, you've never seen such an excited bunch of 4 and 5 year olds I just love those little squeals of delight. We picked peas from the school garden that we planted a few months ago.... and even ate them. We made a new friend, we went out to lunch and had root beer, macaroni and cheese aaaand french fries. And then, well then we signed up for Karate!!!  Or as little miss 'M' says it "Kyratee" and then we came home, sat on the patio and had strawberry Popsicles by the pool.


It doesn't get much better than that.


Toasting the cumin, mustard and coriander seeds brings out a impeccable aroma and a flavor that pre ground spices just can't match. Toast them in a cast iron skillet over medium low heat for a few minutes until a glorious, yes glorious aroma wafts through the air. You should see me hanging over the skillet breathing deeply and trying not to drool into the pan. 


In a small grinder (preferably not one used for coffee as flavors can linger) pulse a few times until ground. Again, breath in the toasted loveliness. 


Serve with fluffy cous cous and your favorite vegetables. I lightly saute chopped zucchini and shallots in the pot before I add broth and cous cous. Throw some grape or cherry tomatoes in the baking dish with the fish.


TIME        30 MINUTES        SERVES     4


You Will Need


3 pieces of Rock fish or other fish, about 8 ounces each
2 teaspoons olive oil to coat baking dish
salt and cracked black pepper to taste


For the Harissa

1 cup cilantro, stems removed
1 cup flat leaf parsley, stems removed
2 jalapenos, seeds removed
1/4 cup fresh lemon juice
1/4 cup extra virgin olive oil (preferably cold pressed)
1/3 cup scallions, chopped
2-3 garlic cloves smashed
2 tablespoons cumin seeds
1 tablespoon coriander seeds
1 tablespoon mustard seeds
1/2  teaspoon sea salt


Pre heat your oven to 425F.

In a small cast iron skillet over medium low heat toast the seeds for 2-3 minutes until fragrant and lightly browned. Immediately remove from heat and place in a small bowl or 'coffee' grinder. Grind the seeds to a fine consistency. Place remaining ingredients along with the spices in a small food processor or blender. Blend on low speed or pulse just until combined.

In a ceramic baking dish coat with olive oil. Place the fish in the dish and lightly sprinkle with salt and pepper. Spoon desired amount of harissa over the fish. Bake uncovered for 15-20 minutes until fish flakes easily with a fork. 


YOU MIGHT ALSO LIKE


Pan Crusted Sable Fish 


Grilled Fish Tacos on Home Made Blue Corn Tortillas w Mango Salsa


Fish en Parchment 101 with Asian Veggies and Miso


From Around the Web


No Cook Green Harissa Pasta with Shrimp from Food and Wine


Moroccan Spiced Chicken Enchiladas with Harissa Sauce from Climbing Grier Mountain


Garden Vegetable Tagine with Harissa from Nutrition Stripped


Read more ...

Saturday, February 7, 2015

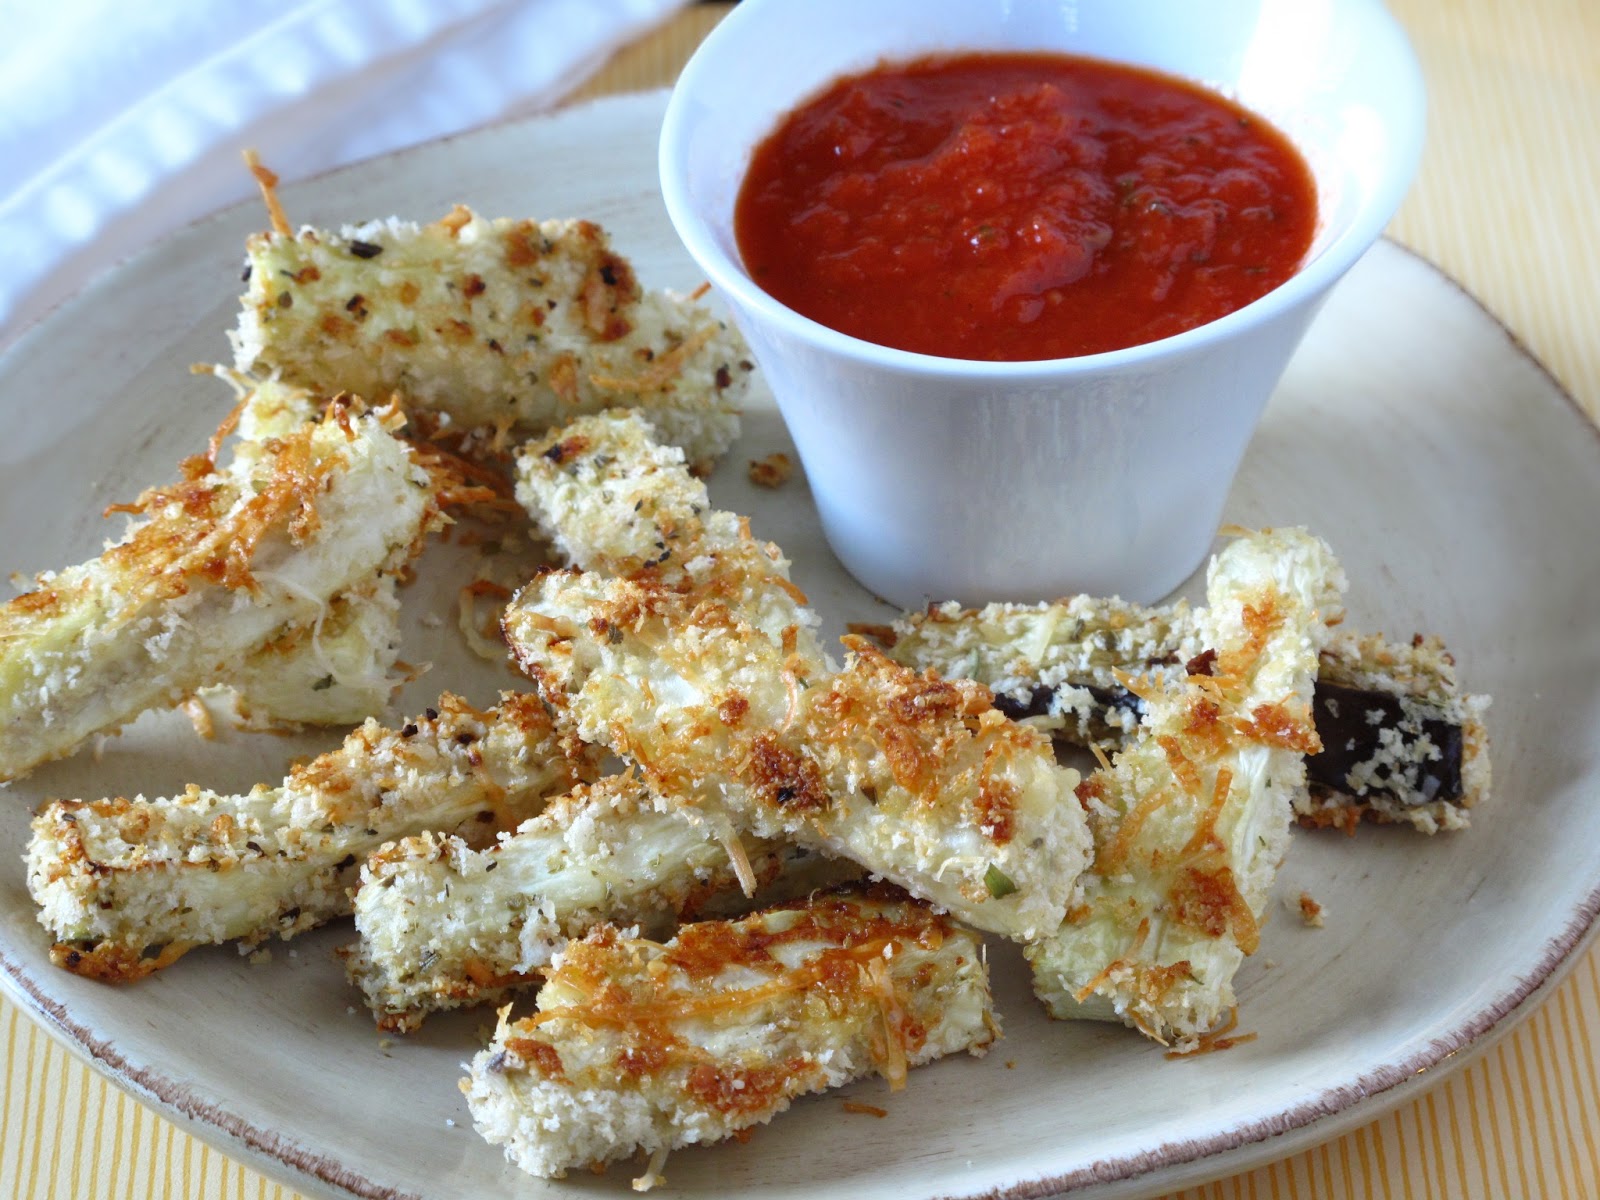
Baked Parmesan Eggplant Dippers with Marinara


Did I have you at marinara or at Parmesan? I could sprinkle Parmesan on a bowl of warm, freshly made marinara and eat it with a spoon. Not weird at all.  I do have a glass of red wine, preferably a good Malbec from Argentina or Chile (is there any other kind) as an accompaniment if it makes you feel any better.  A perfectly well rounded meal after a long day of saving lives (both at the hospital and on my days off at home with the kids) if I might say so myself.


I'm not trying to delude from the fact that eggplant is one of my favorite foods in the world, because it is. But give me some cheese and a nice sauce (say that in your best New Jersey accent if you please) and I'm perfectly smitten. Who has time for a real dinner on a Tuesday night anyway?


In my ongoing experiment  quest to get the sweet darlings to eat their vegetables I noticed that anything in the form of a french fry is easier to shove down their throats   coax them lovingly to eat than the same vegetable is when say steamed, boiled, baked or sautéed.  Desperate times my friends. I'm not proud.


So if your in the mood for some good Italian snackin' then this is your lucky day. I'm telling you, easy as pie. Ooooooooo, pyyyyyeeeeee.  Focus Gwen, focus.


So we will bake our cute little french fried eggplants instead of frying them because we are being good and health conscience and want to fit back into our 'skinny' jeans that we've been trying to fit back into since child  numero tres  was born 6 or so odd years ago.   Figuratively speaking.


Cheesy yet satisfying kind of like the Twilight series.


PREP TIME     20      COOK TIME    30 MINUTES       SERVES  4


You Will Need:

2 medium sized eggplant
1 cup Panko bread crumbs  
1 teaspoon dried oregano 
1/4 cup flour
2 tablespoons corn starch
3 eggs
1/2 cup freshly grated Parmesan cheese
1 teaspoon salt, divided
1/2 teaspoon cracked pepper
1 tablespoon extra virgin olive oil
olive oil or spray for baking pan
Your favorite (preferably Organic or home made) Marinara for dipping


Preheat oven to 400F 
Gather 3 small bowls. In one place flour and corn starch. In the second the eggs, lightly whisked with a fork. In the third the bread crumbs, cheese, oregano, 1/2 of the salt and pepper.
Peel eggplant leaving a few narrow strips of the skin in tact. Cut the top and bottom of each. Cut a thin strip of the eggplant lengthwise so you can easily lay it on its side to cut into strips.
Lay the eggplant on a cutting board on it's cut side and cut lengthwise into even, long strips about 1 inch wide. Stack the slices 2 at a time on top of each other and cut again, lengthwise into even pieces 1 inch thick. Now, cut into strips about 3 inches thick.
Place cut eggplant into a bowl and drizzle with olive oil. Toss to coat. Sprinkle with remaining salt. 
Place eggplant pieces 1 or 2 at a time into flour mixture. Next into eggs, then into breadcrumbs. Place evenly onto a lightly greased baking pan. Leaving a bit of space between each piece. 
Bake at 400F for 20-30 minutes until golden brown and your mouth is watering. 
Serve with really warm marinara.  My favorite brands are Pomi,  Muir Glen and Trader Joe's


Read more ...